Live Install Guide
This is an easy to follow guide to installing Devuan from the CD/DVD images for supported hardware. The general advice accompanying this guide is that you should always backup your data before you begin.
This installation procedure uses the graphical desktop-live installer from the running live image. It may be launched from the desktop icon or the system menu. The root password is toor and the user password is devuan.
0) Before you start: Please read the RELEASE NOTES provided on the desktop.
1) Security warning: The root password of this live installer is publicly known, which is a security risk when connecting to the internet. It is recommended to change the root password before continuing:
~$ sudo passwd
Begin the install by double-clicking the Install Devuan icon on the desktop.
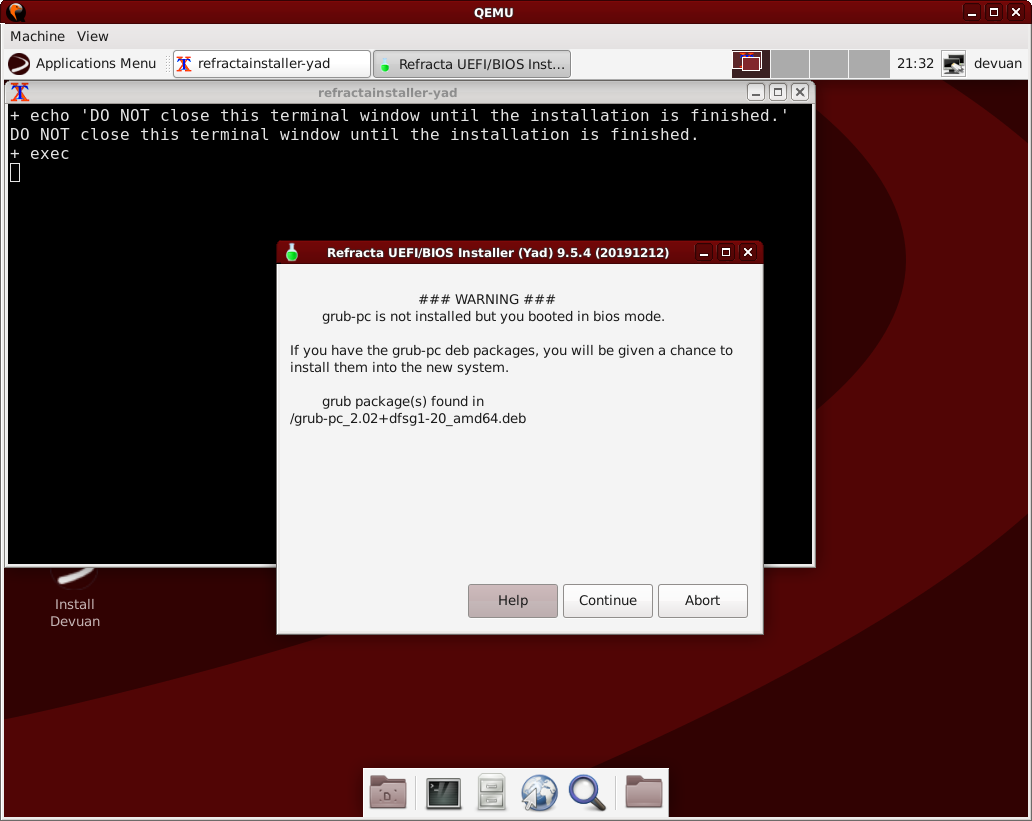
2.1) BIOS MBR mode: This window comes up in the amd64 desktop-live install if you're installing on a BIOS system. Choose 'Continue'.
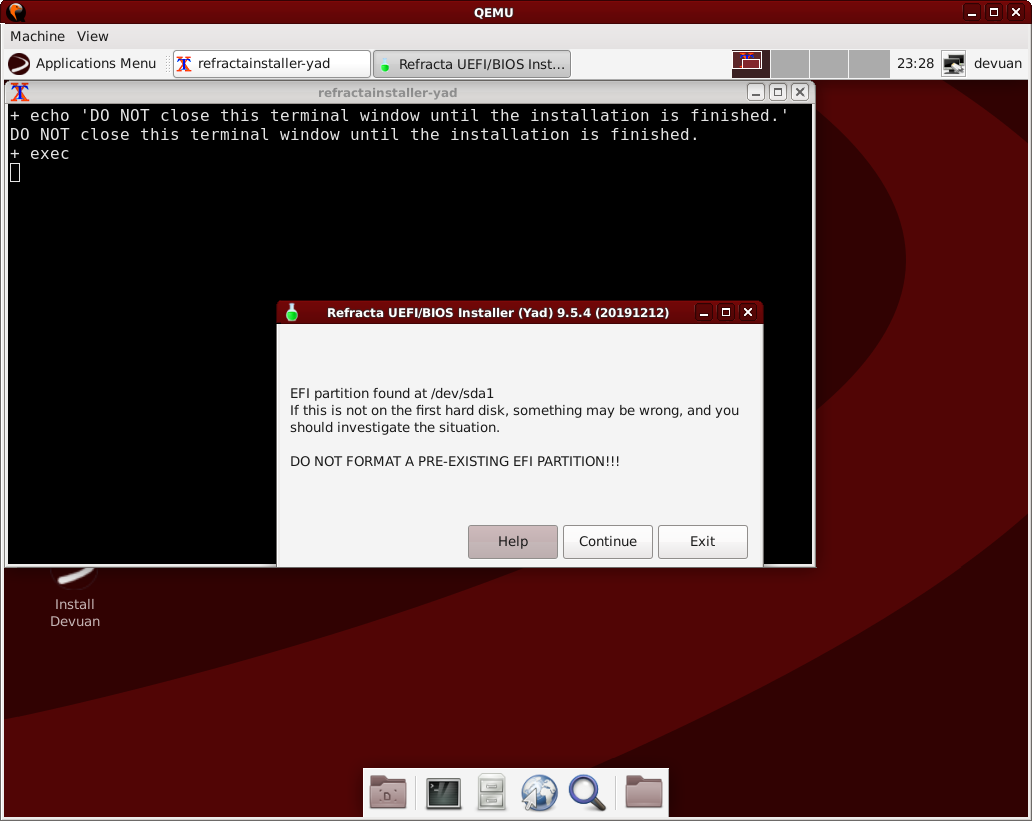
2.2) UEFI mode: In a UEFI install, this informs you whether you have a proper EFI partition or not. If an EFI partition is detected, make sure that it resides on the first disk before continuing.
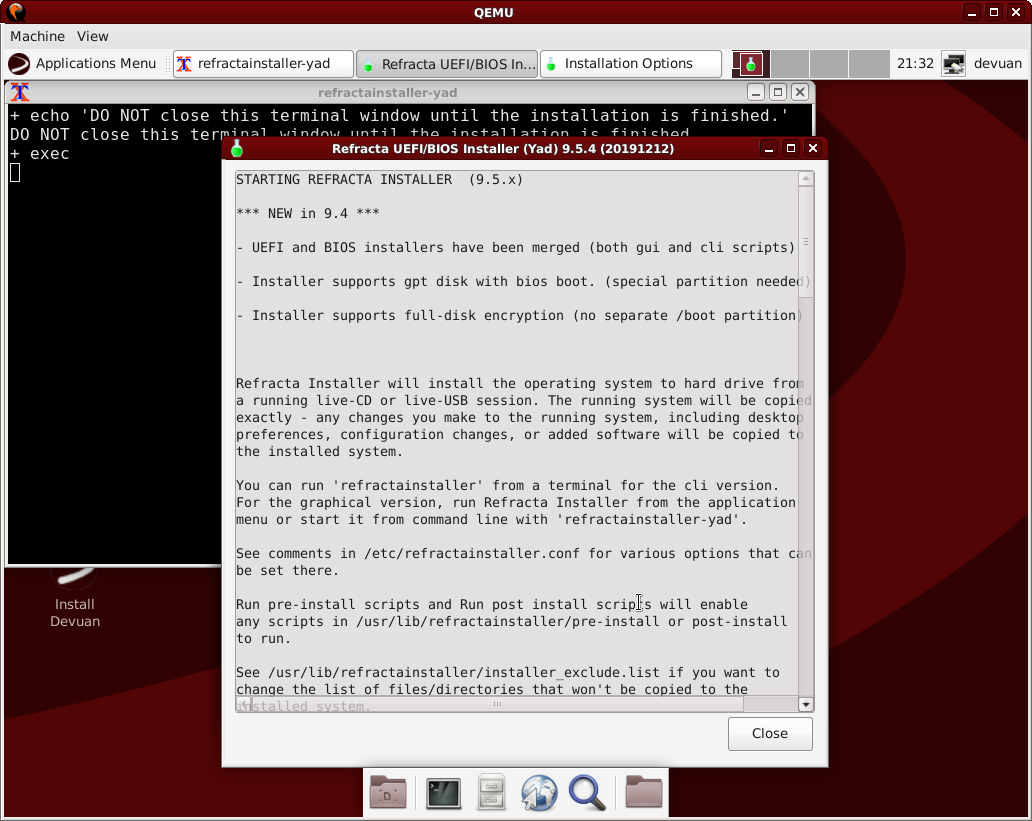
2.3) Help: Additional options and information.
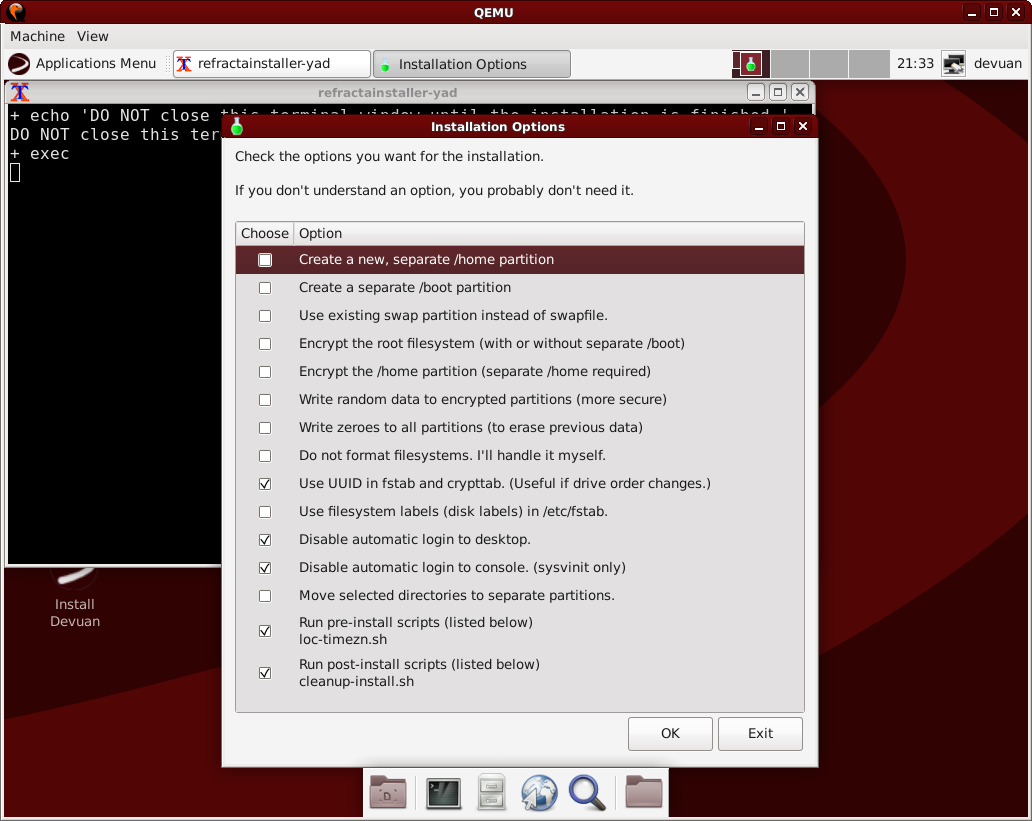
3.1) Installation options: Choose your installation options here. For example, you can choose to have certain directories mounted as a partition instead of installing to a single root partition.
3.2) Encryption: The installer can only encrypt root and home filesystems. A separate boot partition is optional and will be unencrypted if present. For full protection of your data you should not use a separate swap partition. If there is no swap partition, a swap file will be created on the root filesystem and that will be encrypted.
For traditional hard disks you can choose to write random data to encrypted partitions for additional security. This can take a long time depending on the size of partitions. You might not want to do this for Solid State Drives due to their write limits.

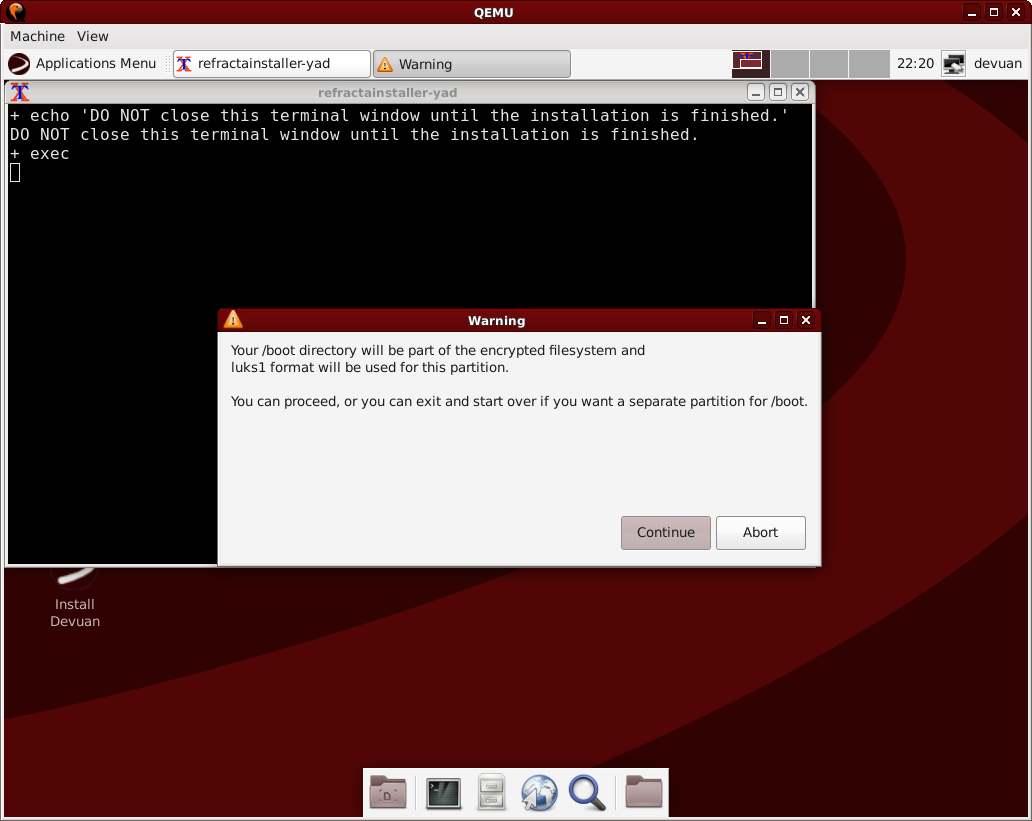
3.3) Boot directory encryption: By default the boot directory will be encrypted. This is generally a good idea for full disk encryption setups.
4.1) Summary: This screen reminds you of the partitions currently on your system before you prepare a location to install Devuan.
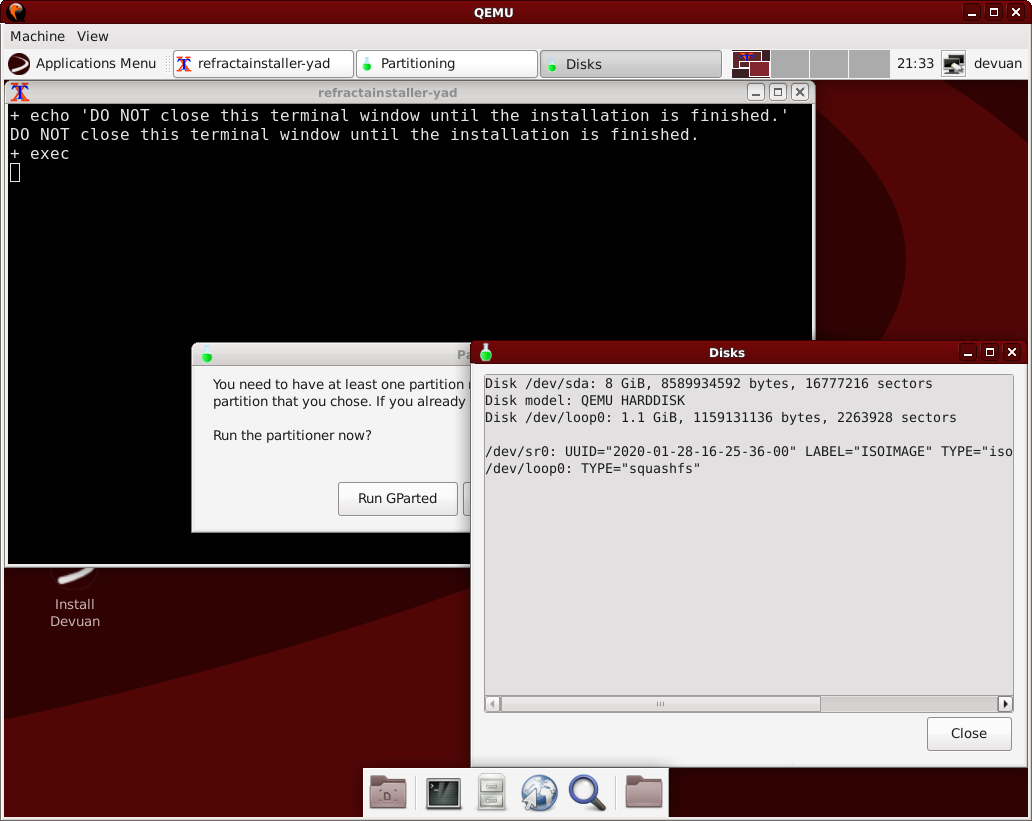
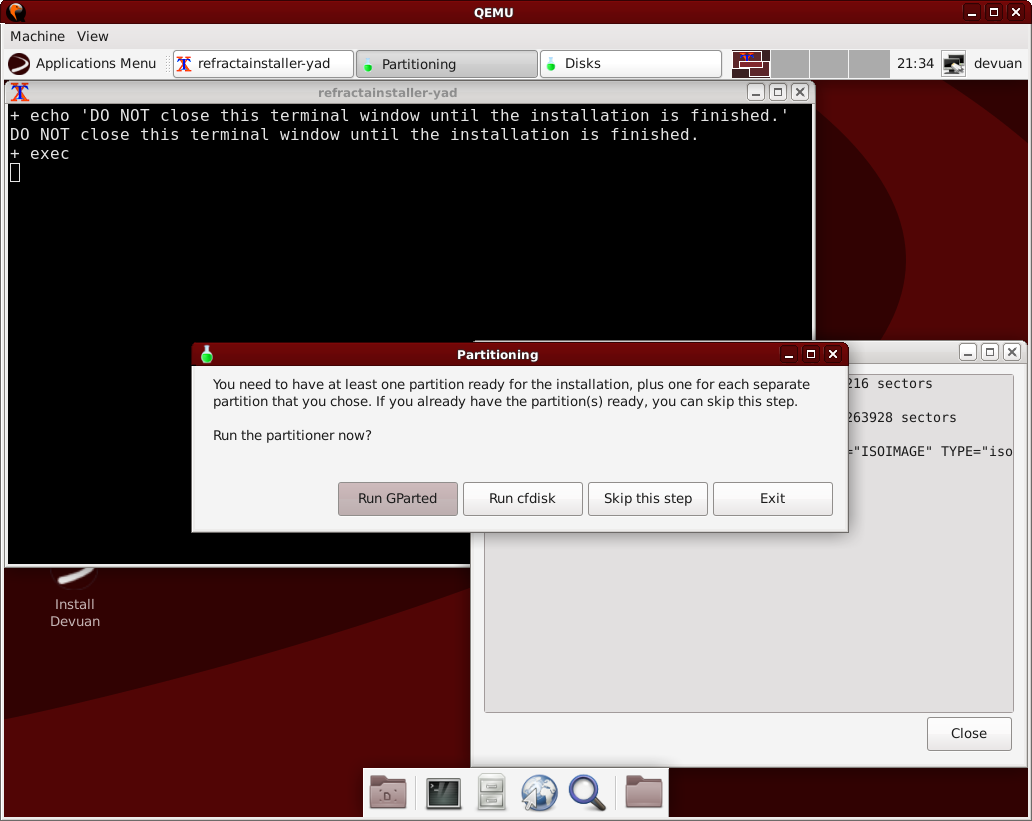
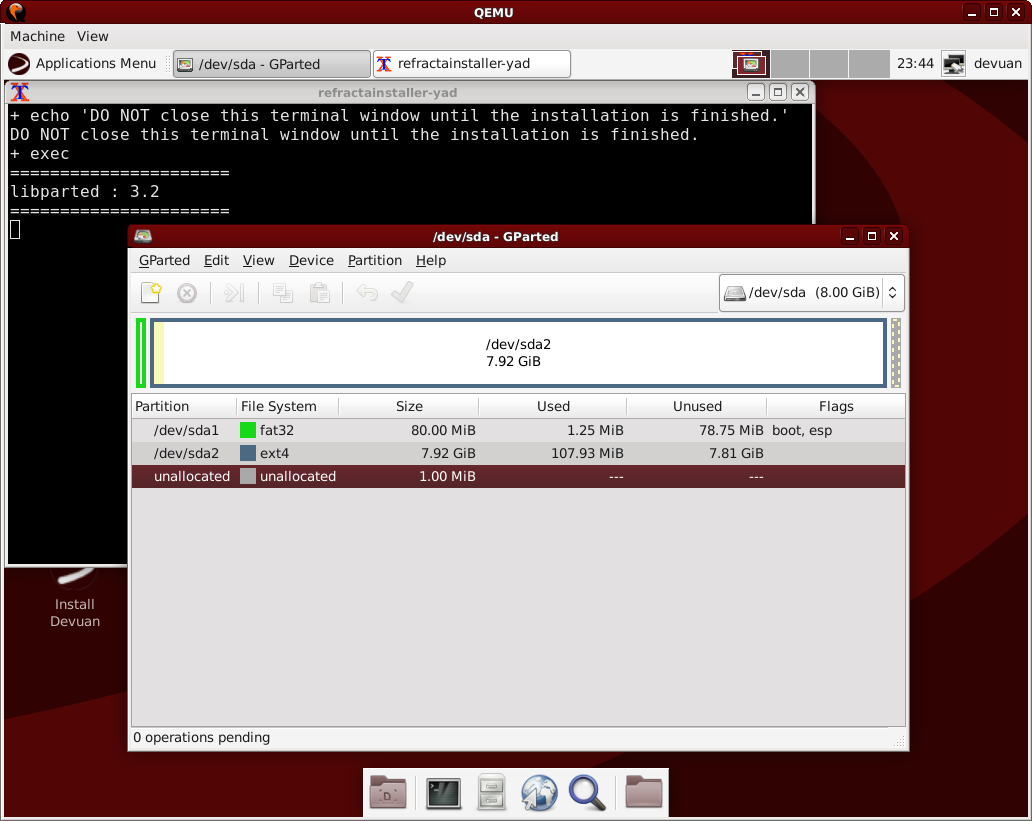
4.2) Choose a partitioning method: If the drive is already partitioned you can skip this step. You will now be presented choices for how you'd like to partition your installation drive. The easiest of these options is to use GParted. Choose GParted to continue with this walkthrough, as the other options are beyond the scope of this discussion.
4.3) Using GParted: You should now create your partitions with GParted. You will need to create at least a root filesystem and any partitions you previously told the installer about. If warned by GParted to do so, create a partition table according to your boot mode which was discussed earlier - use an msdos partition table for MBR boot mode or a gpt partiton table for UEFI boot mode. For UEFI, you must have a proper EFI partition: 50-500MB, FAT32, with esp flag in gparted or EF00 in gdisk. This window shows a valid partition scheme for a UEFI install.
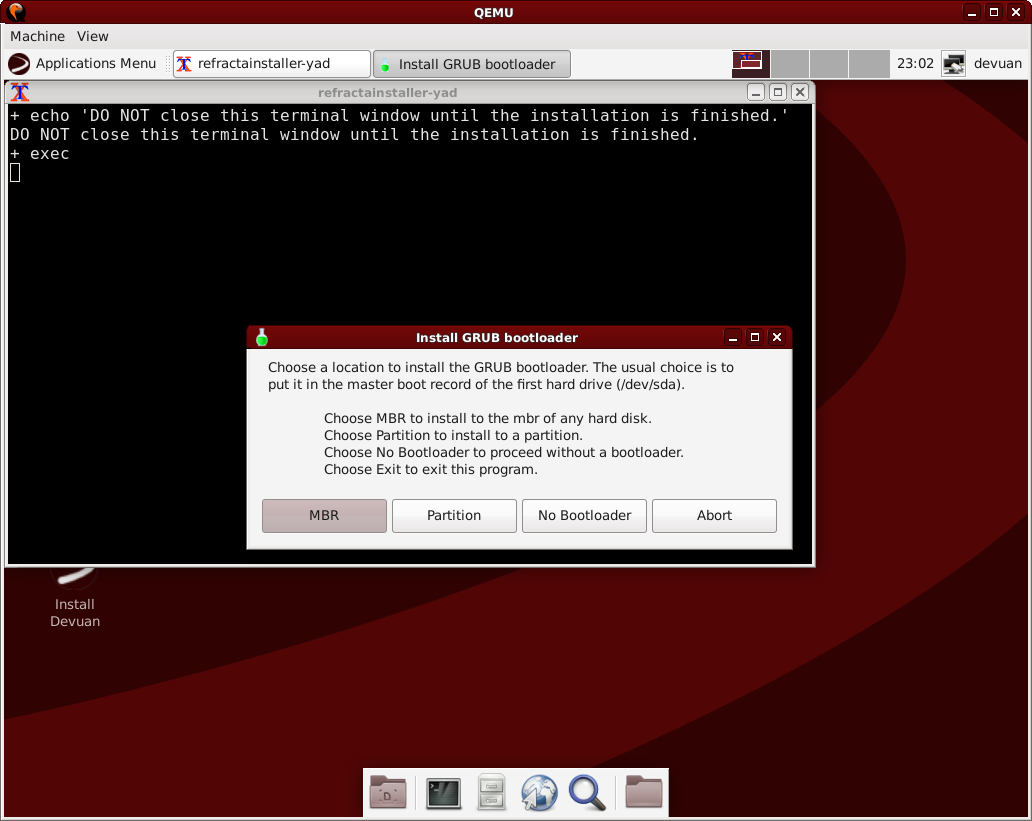
5.1) Bootloader location: Now, on an i386 machine you will be asked where the bootloader should be installed. In most cases you should choose to install the GRUB bootloader to the MBR.
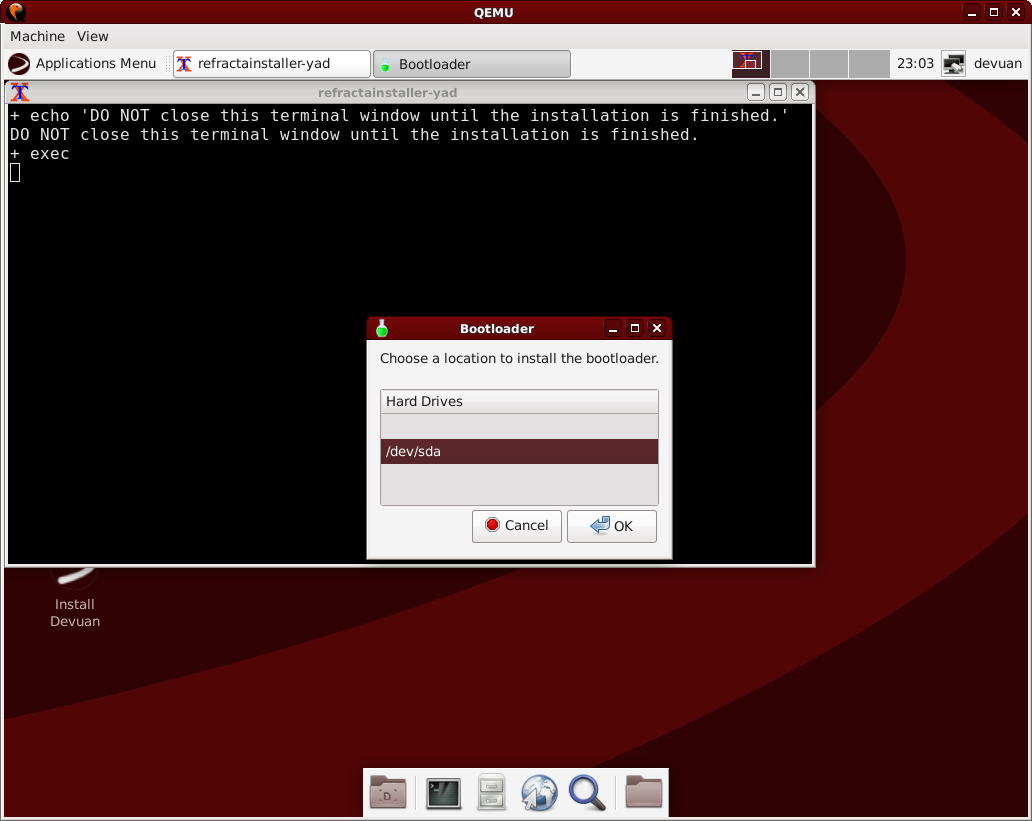
5.2) Choose bootloader location: To continue, now specify the device for installation of the bootloader.
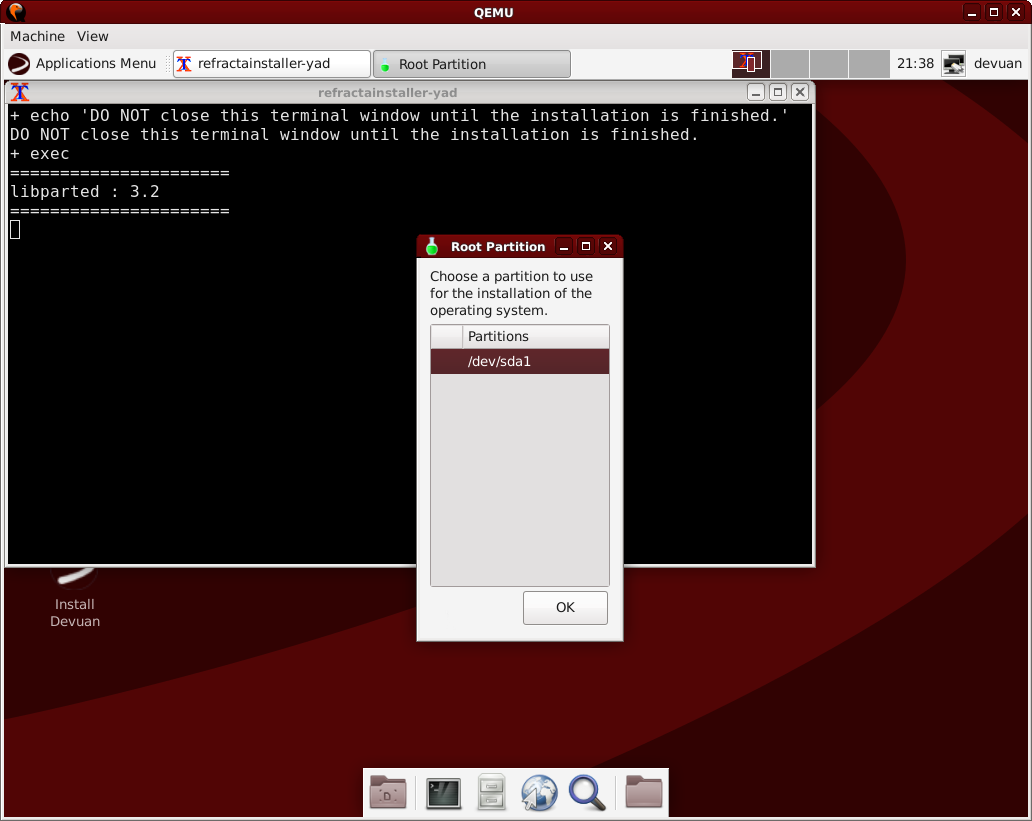
6) Choose the installation partition: You should now choose the partition to which Devuan will be installed. This should be one of the partitions you formatted earlier. To use other filesystems, pre-format them and choose 'Do not format' in the options window. If you chose a separate /home or /boot, you'll get similar windows for each.
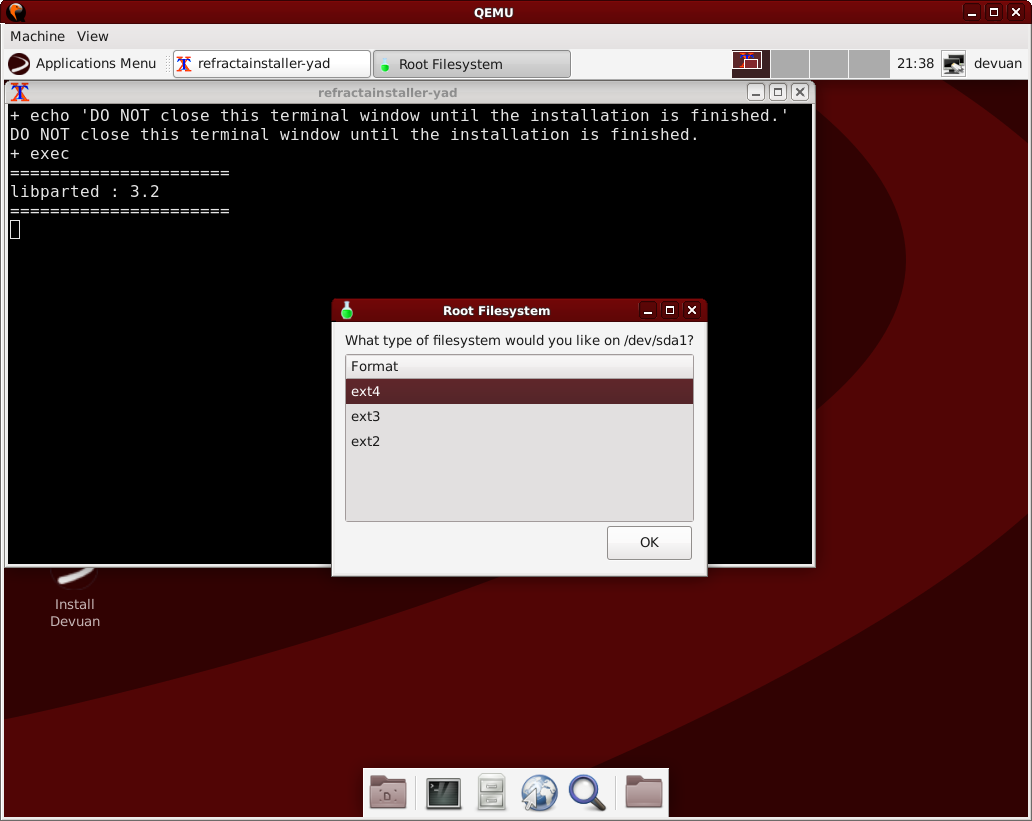
7) Choose a filesystem: Now choose which ext filesystem to use. There are three choices available for filesystems. The most recent iteration is the ext4 filesystem and this is what you should go with here.
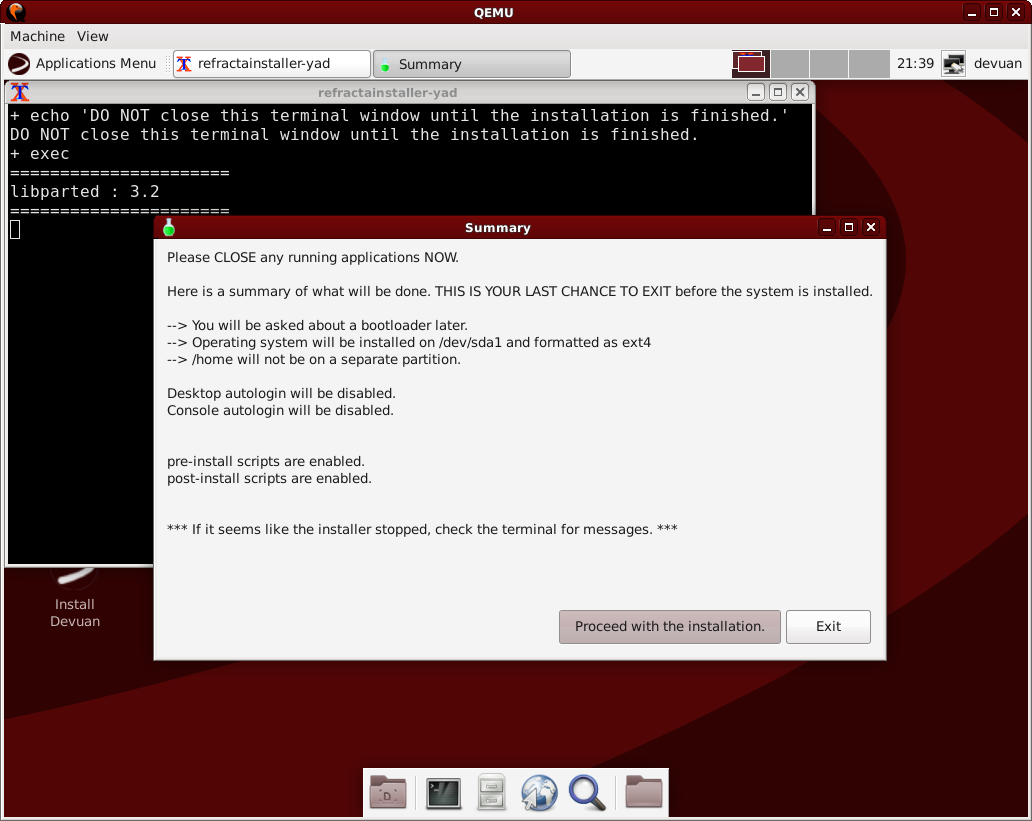
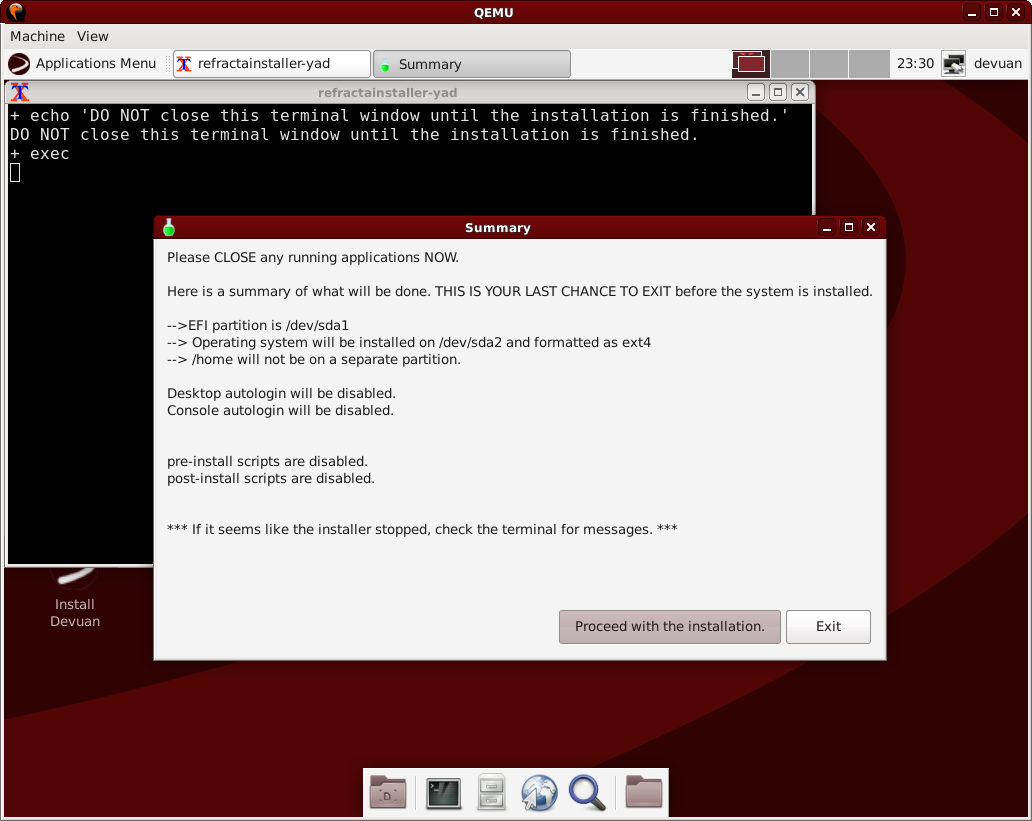
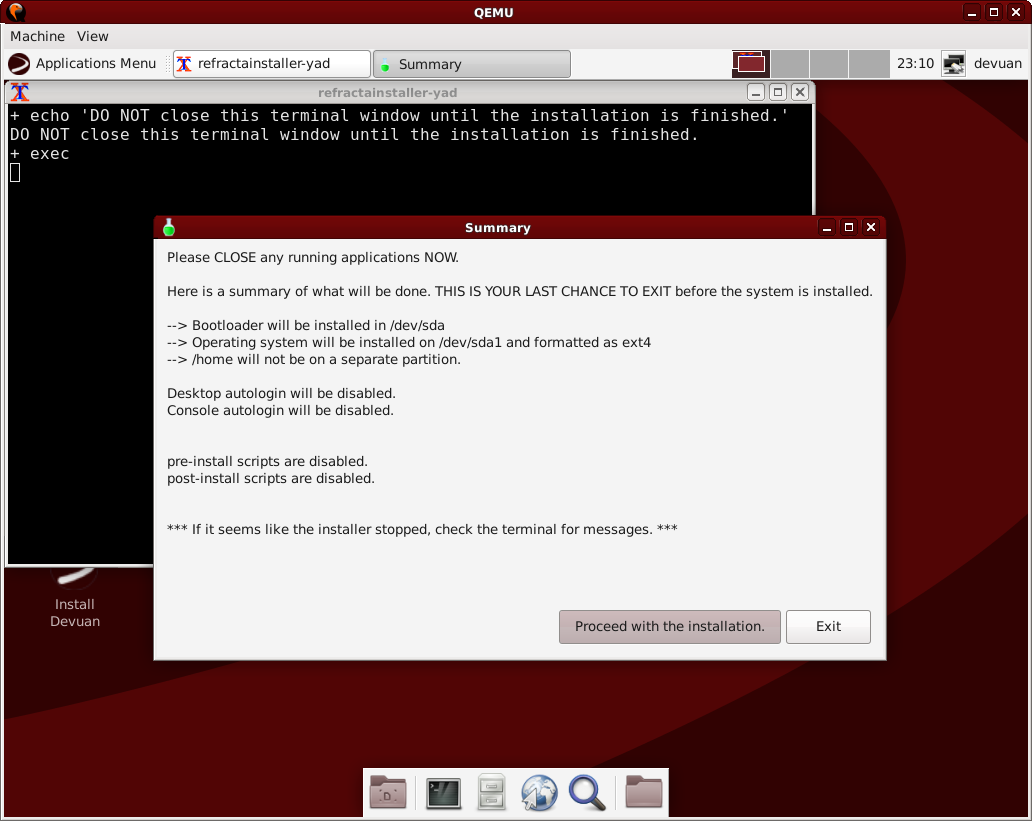
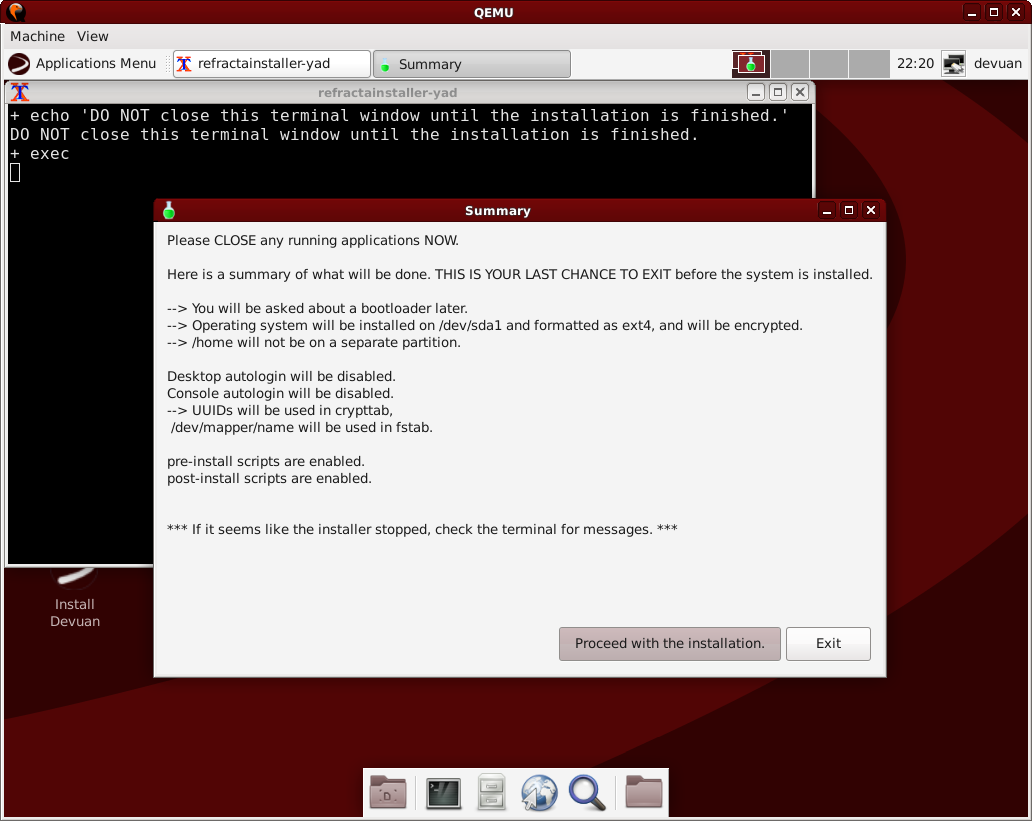
8.0) Summary: The following 4 summaries illustrate how the installation might be done based on your previous choices. Only one of these typical options will appear during the installation process. Make sure these options are acceptable before proceeding with the installation, otherwise you should exit and start over.
8.1) Typical summary for an amd64 BIOS install:
8.2) Typical summary for an amd64 UEFI install:
8.3) Typical summary for an i386 install:
8.4) Typical summary for an encrypted install:
9) Select your geographic area: You should now choose your geographic area from the list. This will allow you to accurately set your time zone.

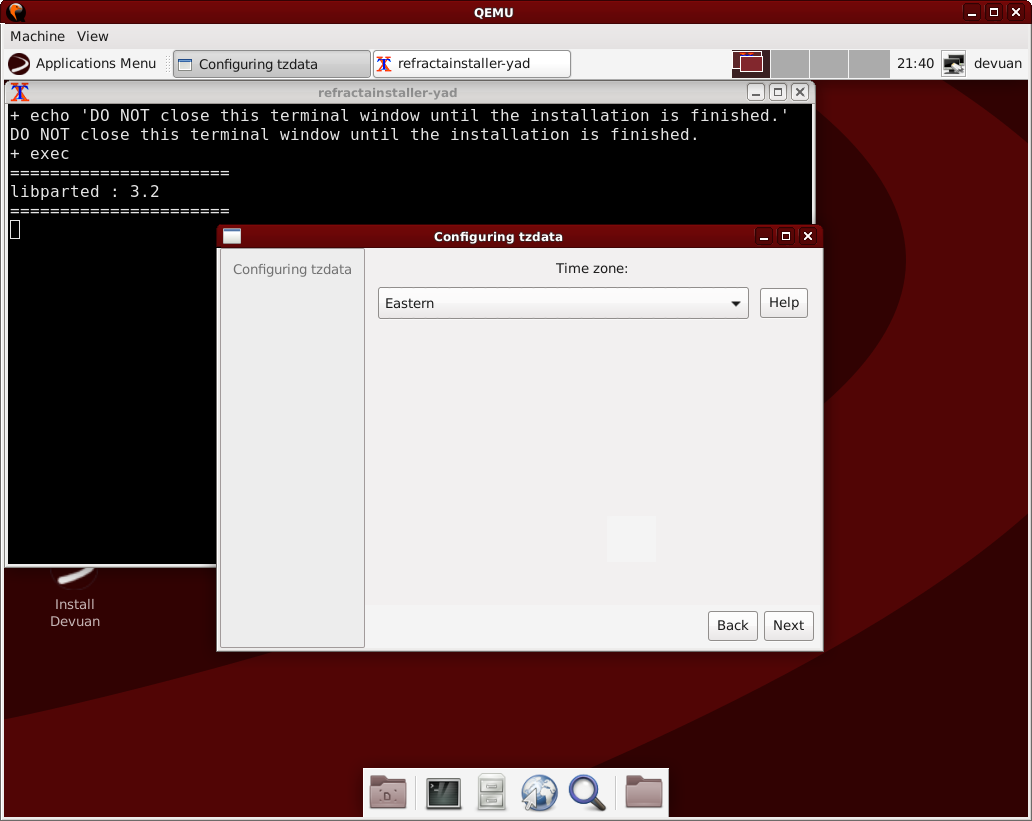
10) Choose your time zone: You can now choose your time zone based on your geographic area. This will be used to configure the system clock.
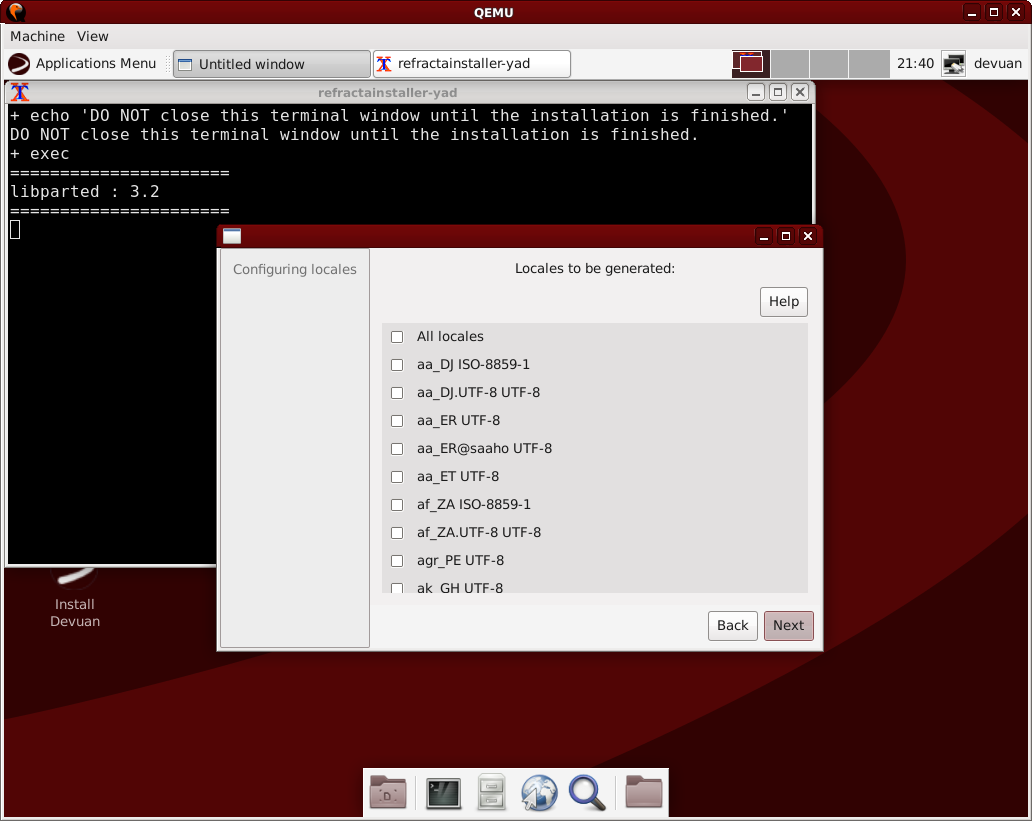
11) Generate additional locales: The UTF-8 locale will be selected automatically, but you can choose to generate more according to your preferences. A common choice would be ISO-8859-1 or ISO-8859-15. If you're unsure, the defaults are safe and you can just continue to the next step.
12) Set the default locale: Now select which locale that will be used. If you generated your own locales you probably want to select one of them here, otherwise choose UTF-8.

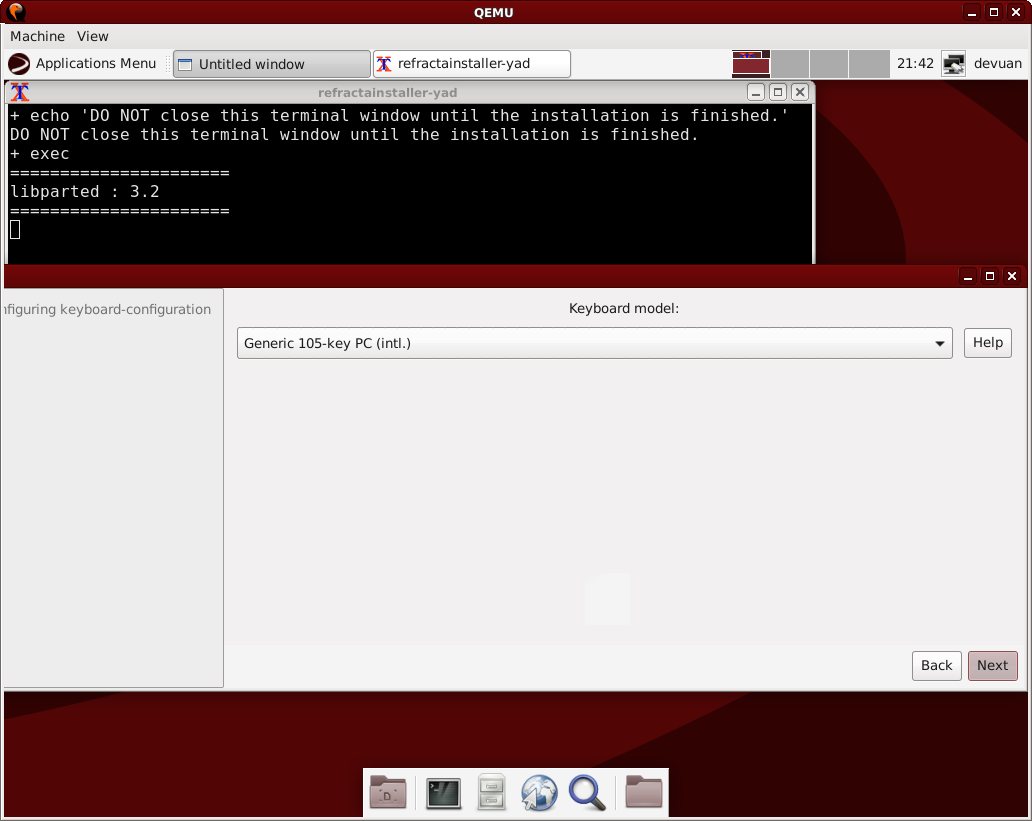
13) Set the keyboard type: You should now let the installer know how many keys your keyboard has. If you're not sure, choose the default as this can always be changed from your desktop after installation in complete.
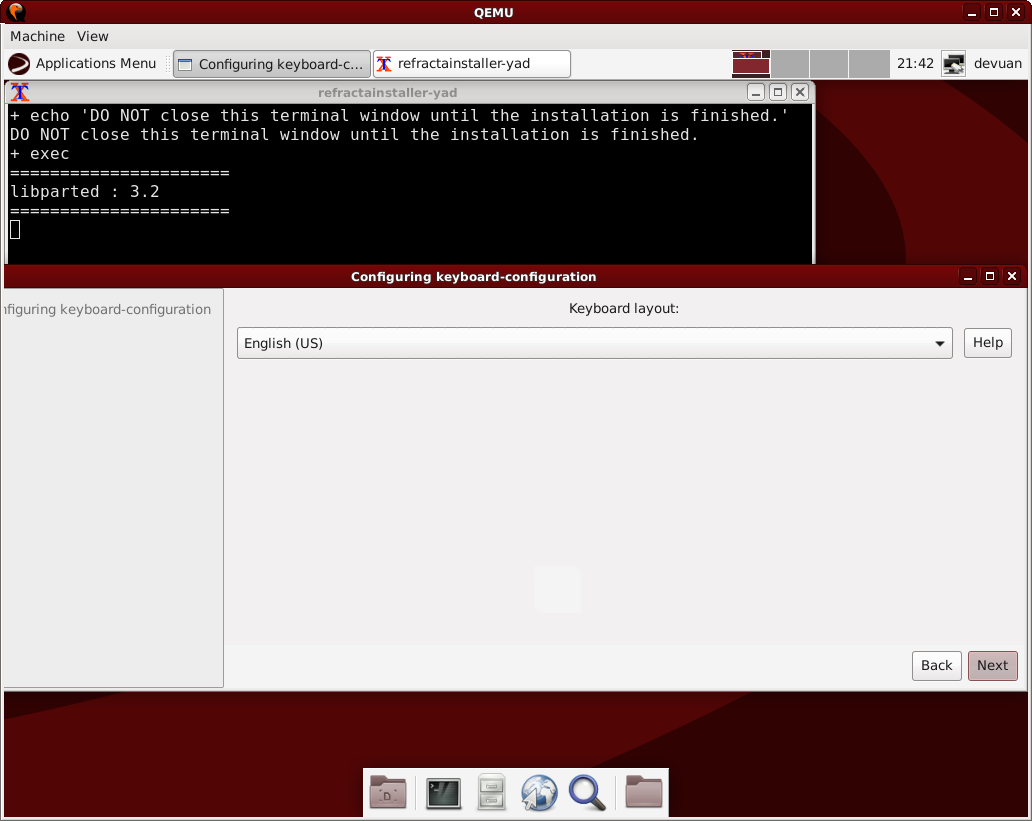
14) Choose a keyboard layout: Choose the keyboard layout you want to use. This should usually be matched to your country unless the layout is different for some reason.
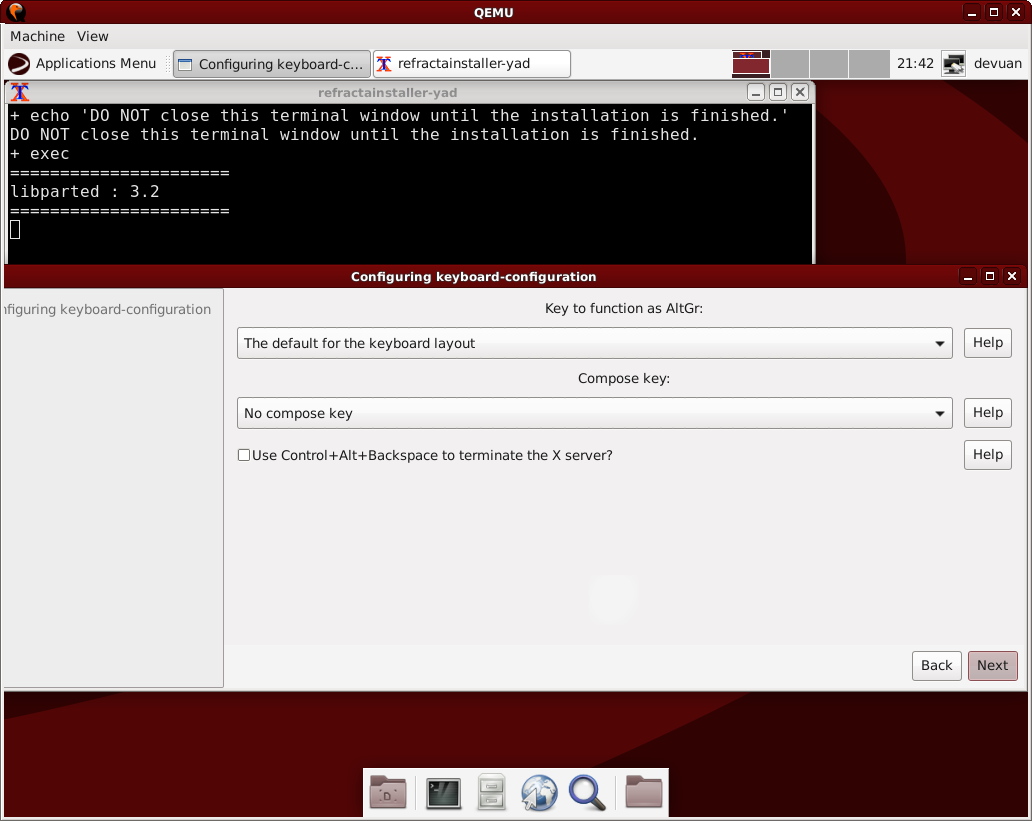
15) Set special keys: Here you can set whether or not the X server can be killed using a special key combination. If Control, Alt and Backspace are pressed together from your desktop the X server will be instantly killed.
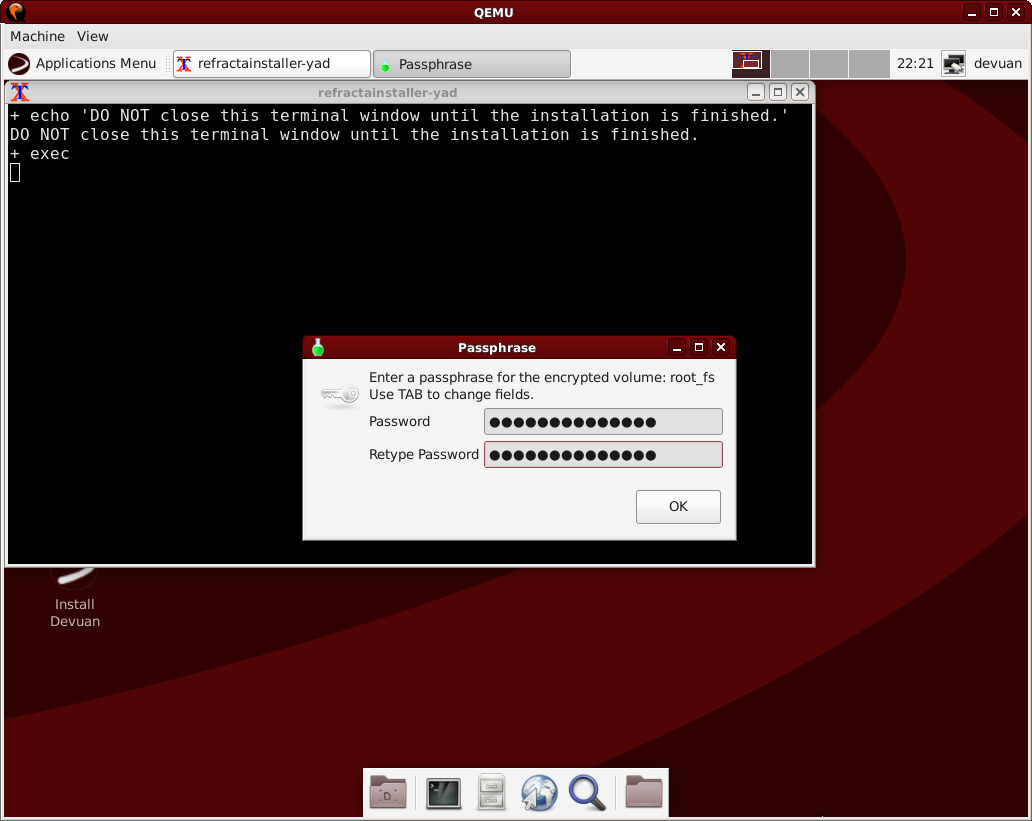
16.1) Set an encryption passphrase: You should now choose a passphrase for any encrypted partitions. You will be required to enter the same password twice to confirm it. It is recommended to use a passphrase that is at least 20 characters long, uses upper and lower case letters, numbers and special characters.
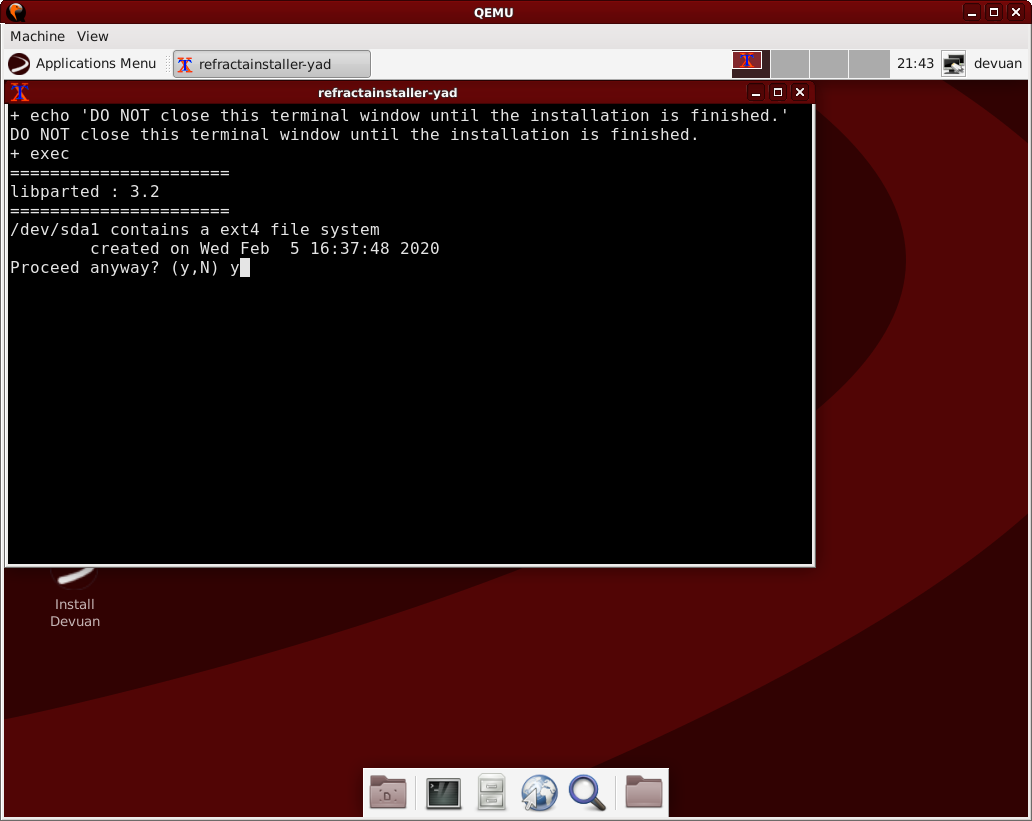
16.2) Confirm the installation partition: Here you will be asked to confirm installation to the partition chosen earlier. If the information matches your choices from earlier, enter Y and press return to continue.
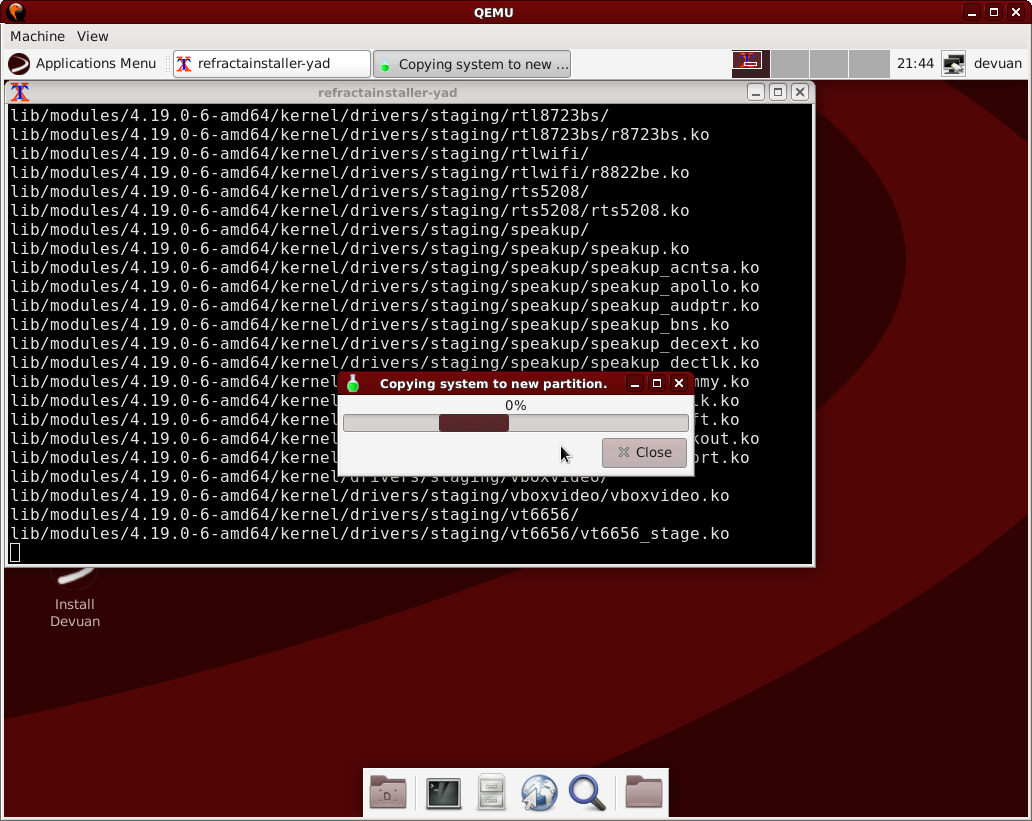
17) Installing the system: The installation has started on the partition you selected. This will take some time.
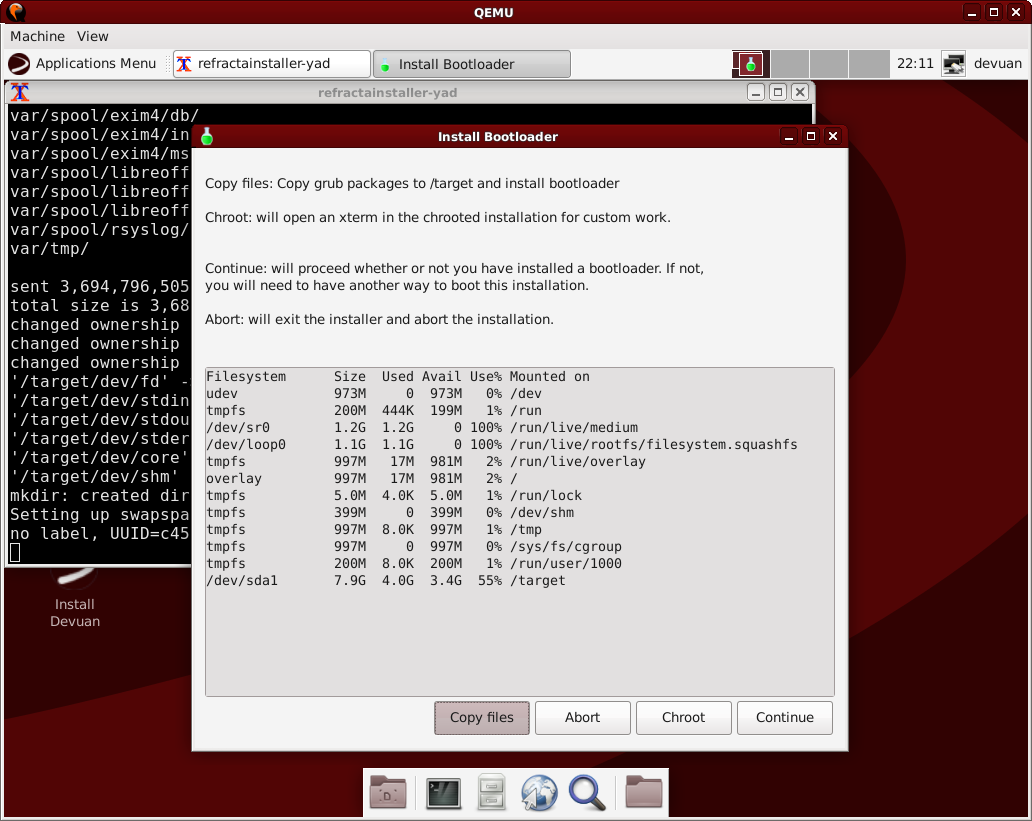
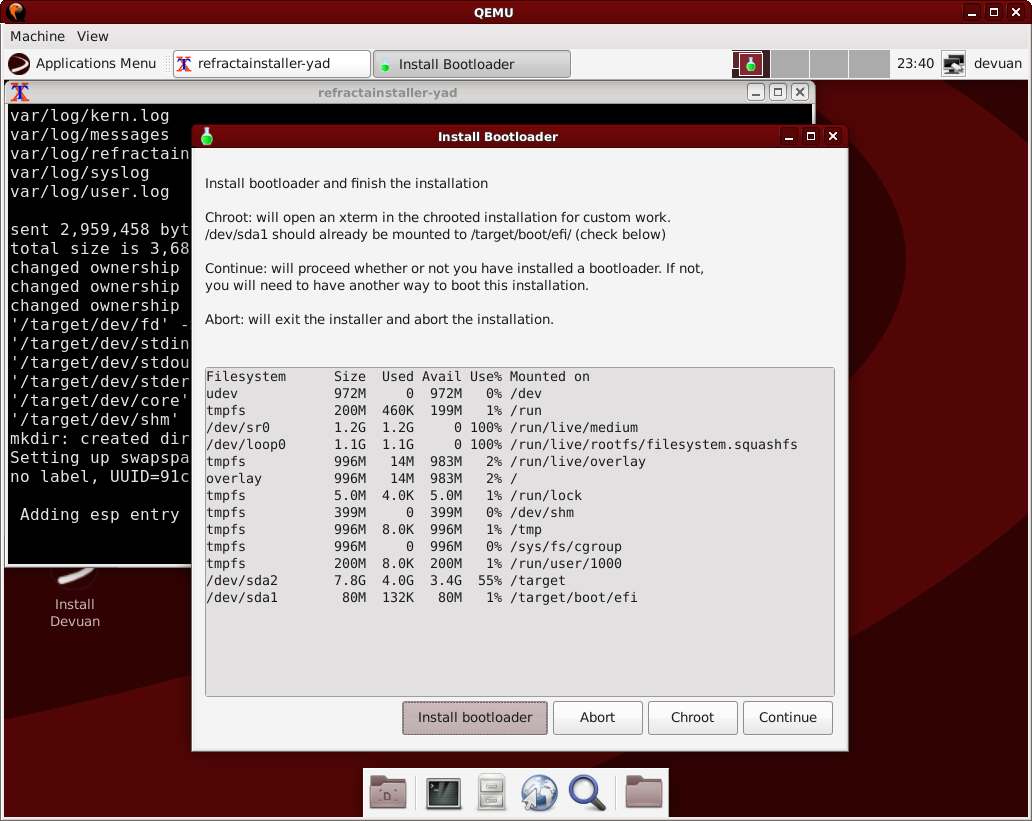
18) Install bootloader: The system has been installed but before it can be booted you should choose to install a bootloader. There is also the option to chroot the install for advanced users.
18.1) BIOS install: In amd64 install on BIOS, the first button says 'Copy files'. That will install the grub-pc package and install the bootloader. If you choose 'Chroot' you'll get a new terminal chrooted into the installed system where you can make manual changes. This will bypass the installation of the grub-pc package and the bootloader. If you want to mess around in chroot and still let the installer add the bootloader, don't press this button. Open another terminal and run sudo chroot /target.
18.2) UEFI install: In an amd64 install on UEFI, the first button says 'Install bootloader'. the correct grub package is already installed and you don't need to choose a location for the bootloader. It will go into the EFI partition. Check section 2.3 'Help' above to learn how to make a proper EFI partition. The installer will complain if you don't have one.
19) The GRUB bootloader: On an amd64/BIOS install the grub-pc package will now be installed This ensures that your system can boot to the newly installed operating system. GRUB is the name of the bootloader used here.
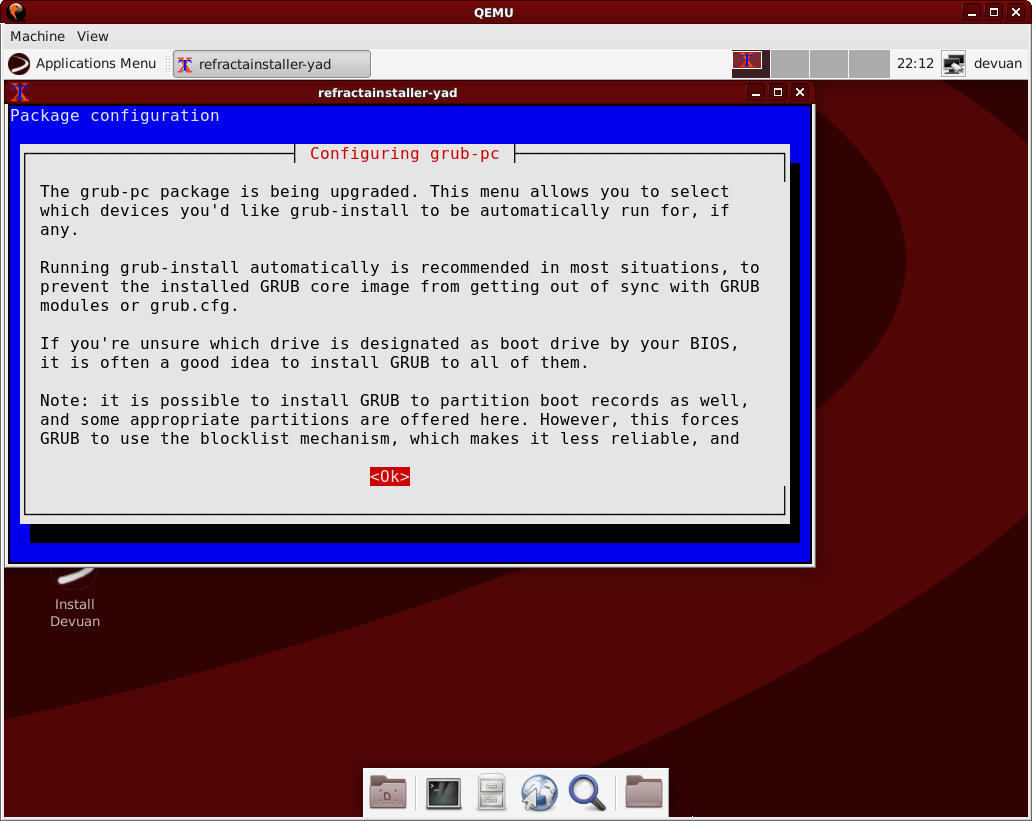
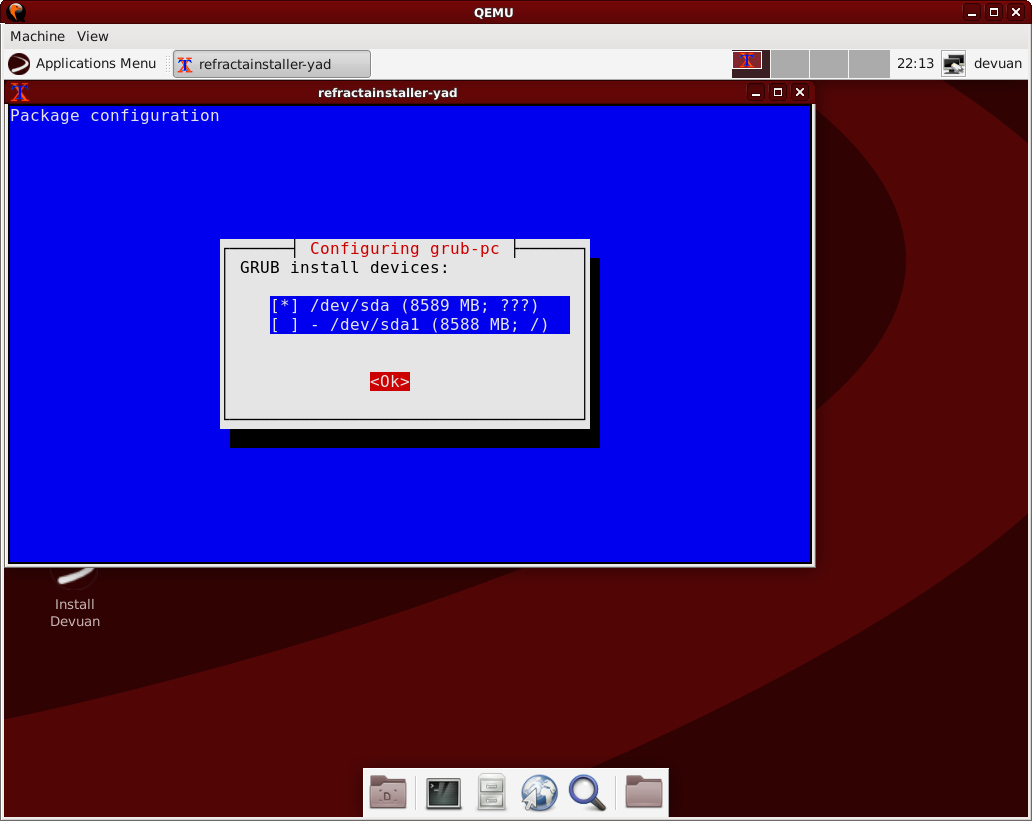
20) Bootloader location: In most cases GRUB should be installed to the first disk from which the system will boot. In this case there is only one disk, indicated by /dev/sda so GRUB should be installed there.
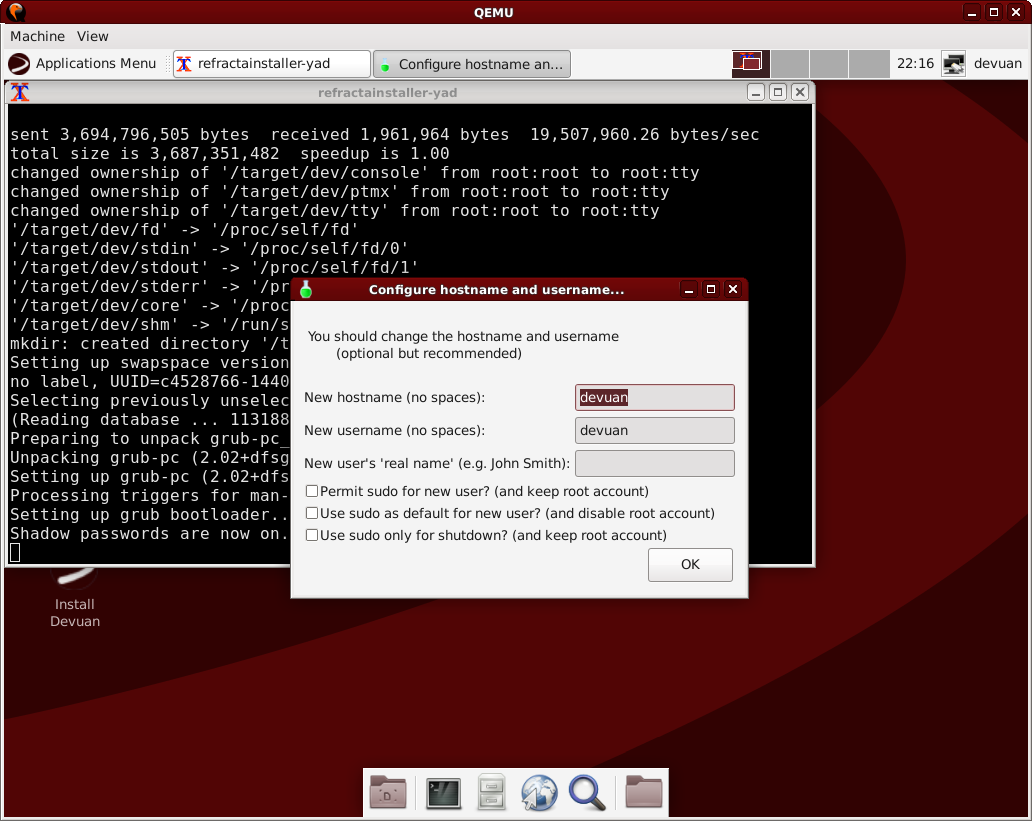
21) Hostname and username: Enter a unique hostname to make it easier to identify this computer on a network without using spaces. Choose any username that takes your fancy but spaces and uppercase letters will not be accepted. In most cases there is no need to enter your real name, so this can be omitted.
22) Root password: Now set a root password if you haven't earlier in this installation. It's good security practise to set a strong password here to protect the root account.

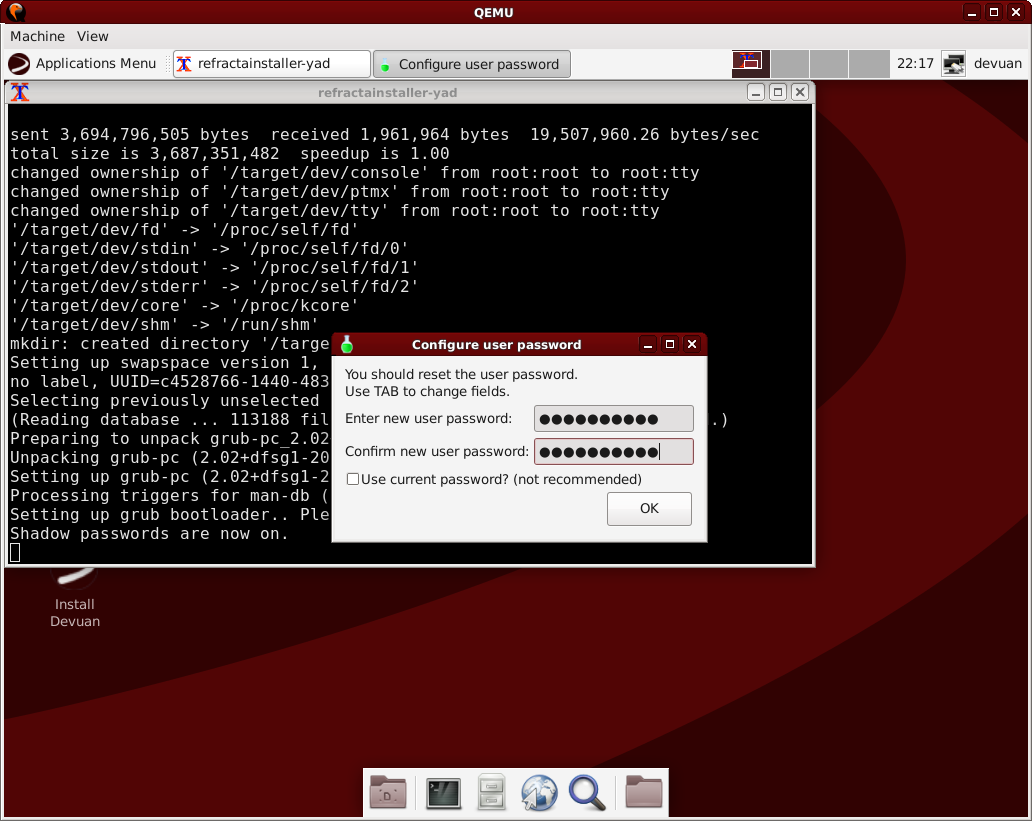
23) User password: Now create a user account password. You should create a password that isn't easy to guess.
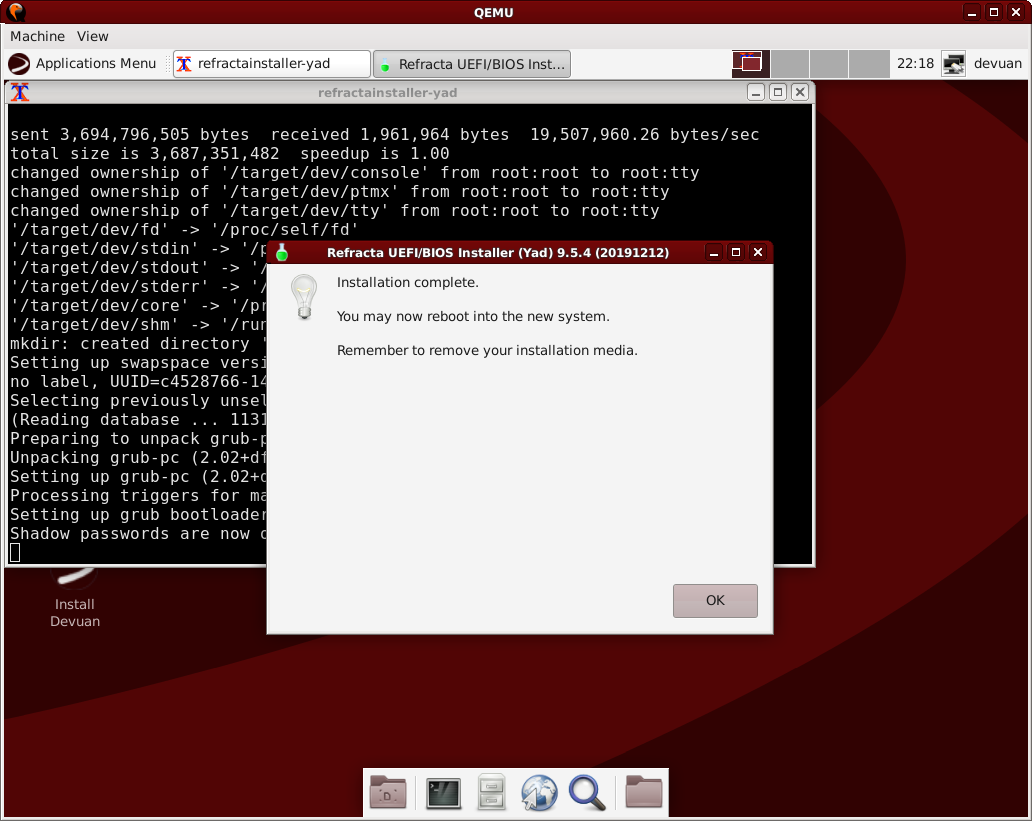
24) Finish: If you see this, you must have done it right.